 by Morgan Daigneault on Sep 16, 2021
Aspen has several different functions where permissions can be customized to suit the needs of your staff and patrons. Permissions can be especially useful when sharing responsibility among staff and for managing content within a consortium or cooperative.
Administrative Permissions
Administrators with the userAdmin role in Aspen have the ability to assign permissions to others using roles. With roles, you can customize what your administrative staff can see and do in Aspen. Roles can be assigned to individuals as well as patron types, such as staff or volunteers.

Viewing and Editing Roles & Permissions
- Visit System Administration → Permissions
- To view a role and its permissions, click the dropdown menu next to Role to edit
- Scroll through to view the selected permissions
- Click the checkbox next to a permission to add it to the role
- Deselect the checkbox next to a permission to remove it from the role.
- If you made changes, scroll to the bottom and click Save Changes

Creating a New Role
- Visit System Administration → Permissions
- Click Create New Role
- Type in a name for the role and add a description
- Add permissions to your new role by clicking the appropriate checkboxes.
- When finished, scroll to the bottom and click Save Changes
Assigning Roles by Patron Type
If there are specific permissions you want all staff members to have, it may not be practical to add each individual user as an administrator.
For example, perhaps you want all of your staff to be able to use the Masquerade function when assisting patrons, or have the ability to create and share lists publically. Instead of adding these users one by one, you can assign roles based on Patron Type (P-Type).
When a role is assigned to a p-type, this means that any user with that p-type who logs into Aspen will have access to the permissions specified for that role.
- Visit Primary Configuration → Patron Types
- Locate the p-type for your staff, then click Edit
- Click the dropdown menu under Assigned Role and select the desired role
- Click Save Changes and Return
Permissions in Web Builder
As of 21.10.00, you have the ability to limit access to web builder pages based on patron type. We’re excited to see how our library partners will utilize this feature! This could be of use to libraries who do not currently have a staff intranet and would like a centralized place to store and share information. As long as the pages are assigned to a staff patron type, other types of users will not be able to access those pages. This feature could even be used for patrons as well to target specific web builder content based on p-type.
- Visit Web Builder. Edit an existing Basic or Custom Page, or create a new one
- Within the settings you will see an option called Require Login to Access. Once checked, a new section will appear called Allow Access that will allow you to select the patron type(s) for which you want to grant access.

After you’ve made your selections, save your changes at the bottom of the screen. You now have a page that only certain p-types can access!
While in the list of basic or custom pages, you can always see at a glance which pages require users to be logged in, and who has access.

Permissions in Menu Links
Let’s say you’ve made a page for internal staff information. Sure, you could send out the URL to everyone… or you could make it easier for them to access by adding this staff-only page as a menu link! However, you’ll want to make sure that this link only appears for those who should have access to the linked page.
- Create a menu link for your page with p-type restrictions. Click here to learn more about creating menu links. Scroll to the bottom of the page and click Save Changes and Stay Here.
- Return to the menu link you just created, then scroll to the right and click the Edit button
- Now you are in the settings for this specific menu link. Here you can click the checkbox for Show to logged in users only, then make sure only the p-type associated with your web builder page is selected.
- Save your changes, and now your menu link will only appear to users of the selected p-type.


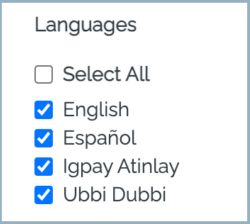
Quick Tip: When editing a menu link, you can also show or hide the link based on what language translation the patron is using for your catalog! This can help you better serve your communities with targeted and relevant content.
Permissions in Browse Categories
If you’re in a consortium with multiple scoped catalogs, Aspen makes it easy to manage Browse Categories with permissions!
Learn More About Browse Categories
When creating a new Browse Category, that category will be tied to the user ID and home library associated with the account who created it. User IDs can be found by checking the Administration Users settings under System Administration. Aspen will also append the library name to the beginning of the text ID.

By default, Browse Categories are shared with everyone. To make sure only users from your own library can see and edit your browse categories, you’ll need to adjust the settings. Open the settings by clicking into the ID number of the Browse Category or scrolling to the right and clicking Edit.
Next, click the dropdown under Share With and change it from “Everyone” to “My Home Library.”
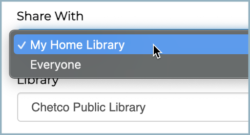
Then, make sure the correct library location is selected and save your changes. Adjusting these permissions for Browse Categories can be a good practice when many different libraries are involved with administering Aspen.
This way, you will not have to filter through browse categories created by other library locations, and you won’t have to worry about someone accidentally editing or deleting the Browse Categories you’ve created.
We hope you’ve learned some helpful tips for managing Aspen content with permissions among library staff and patrons alike. If you have created any web builder content for specific p-types, we would love to see your work! Please share in the Aspen Slack Workspace so other libraries can also see it! If you have ideas for any other areas of Aspen where permissions could be useful, please reach out and talk to us or bring it up at the next Aspen Gathering.
Read more by Morgan Daigneault