Koha ILS
Koha tutorial on the Inventory tool - Part 1 Barcode File
In this Koha tutorial Kelly and Jessie will walk you through uploading a file of barcodes in the inventory tool. This is part 1 of a 2 part series on using the inventory tool.
Koha’s Inventory Tool can be used in one of two ways, by generating a shelf list that you can then mark items off on (through the module on a mobile device or laptop or by printing), or by uploading a text files of barcodes gathered by a portable scanner. We will walk you through the steps of uploading a text files of barcodes gathered by a portable scanner in part 1.
Steps to upload a file
- First, go to More > Tools > Catalog > Inventory
- You can upload a txt file that you saved from scanning barcodes in the stacks or shelves.
- You can do this by taking a book cart with the laptop and scanner or using an iOS or Android device to scan those barcodes.
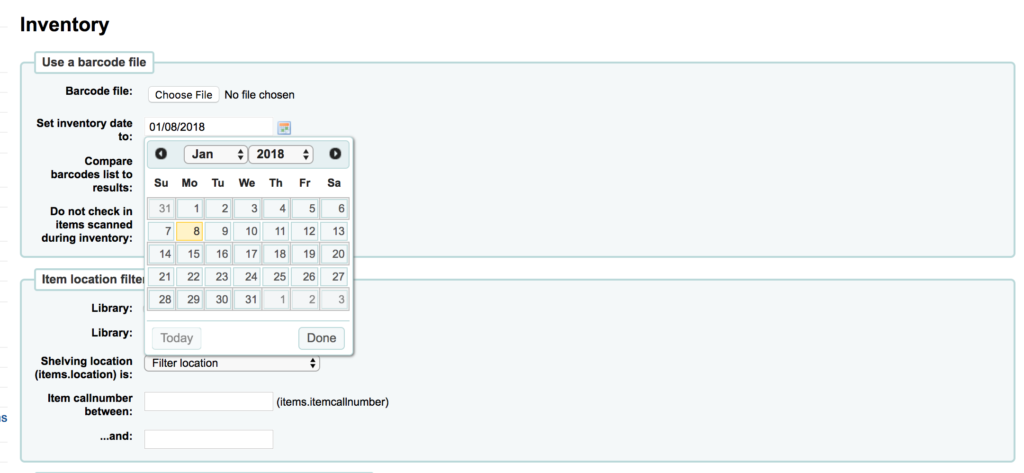
- Next, under Use a barcode file select the button to choose file and attach the file to the inventory tool.
- The default inventory date will be set to today’s date, however you can click the calendar button to the right of the box and select the date you scanned your barcodes on.

- Selecting the checkbox for Compare barcodes list to results will allow you to compare the results you scanned to a section below using your item location filters. This will show you items that may not have been scanned in your initial attempt.

- Your next checkbox will be to Do not check in items scanned during inventory.
- If you do not select the ‘Do not check in items scanned during inventory’ option, the items get checked in but there’s no warning on the inventory results screen letting you know they have been checked in.
- In prior releases, a yellow box would report check-ins alerting staff to check.
- The next section includes optional filters for inventory lists or comparing barcodes
- If you select any of these boxes (example Lost or Missing), this will filter the results on the next page to show you all items that are marked lost of missing (depending on what boxes you check).
- If an item has a lost status, and the barcode was included in the file, the inventory tool updates the status but does not report the status change on the results page.
- Finally hit submit.
- Your results will be on the next page.
- You will get a blue box notifying you how many items were changed – example: 1 items modified : datelastseen set to 01/08/2018
- You will also get a yellow box notifying you the number of barcodes read in the file – example: Number of potential barcodes read: 1
- You may get the 2 notifications above and no data available in table (as seen in the screenshot for results below). THIS IS A CHANGE from prior releases. The inventory tool no longer shows results to let you double check your check.

Bugs Pertaining to the Inventory Tool
View other Koha tutorials on the ByWater Solutions’ Blog or subscribe to our YouTube Channel for the latest Koha tutorial videos.
Read more by Jessie Zairo

