Koha How-To
Video Tutorial on Creating Spine Labels with Koha
 by Kelly McElligott on Nov 15, 2017
In this Koha tutorial video and step by step instructions on how to use the Label Creator in Koha to create Spine Labels.
We have had lots of support tickets on the Tool “ Label Creator” . This blog post includes both step by step instructions and a video on how to set up printing Spine Labels in your library. I will be posting a video and step by step instructions soon on how to print barcodes- so check back!
I hope this will help you set up your labels and or find out a solution to why you thought you couldn’t’ use the label creator!
Let’s start easy! Grab your label sheet or roll of labels and a ruler! You will need to precisely measure some details for Koha to know what the labels will be printed on.
I will give two types of label examples for you in this blog post, but if your library wants to share your label experiences- I would love for you to share them!
For my first example I will use a standard Spine Label sheet from Demco. The labels are 1 inch in height, ¾ inch in width. There are 10 rows and 10 columns.
- Go to Tools
- Choose Label Creator
- Choose the New dropdown menu – new Label Template
- Create a Code for this Label and also a description. If you are a multi branch system, you could add your library code to this description, so you know which label is yours.
- Next choose the Units in which you will be measuring your labels with.
- I am going to choose Inches.
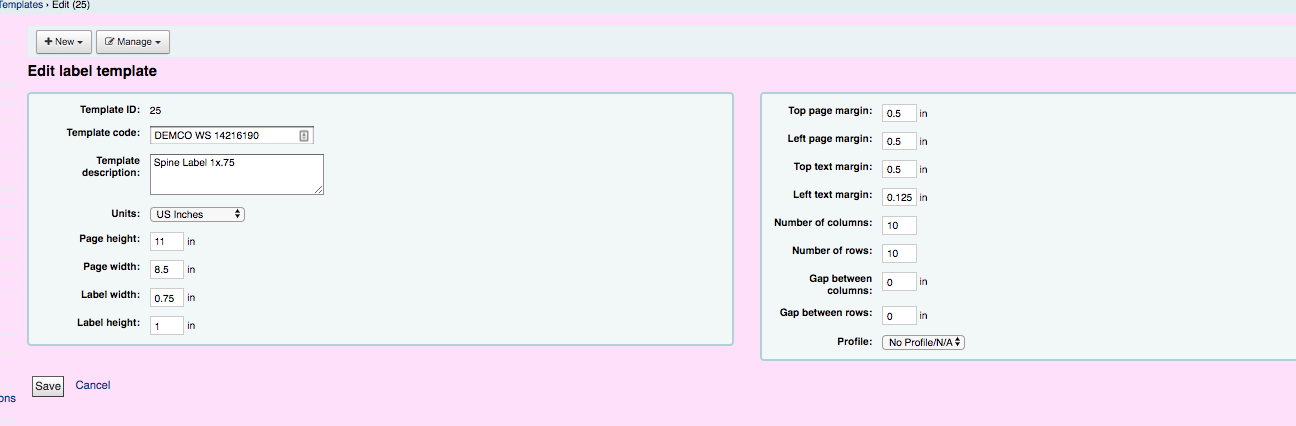
- Page Height and Page Width is the size of the paper is the label on. My label sheet is a standard size piece of paper – so I will enter 11 in for Page Height and 8.5 in for Page Width.
- Now the size of the actual label is next: Label Width is .75 and Label Height is 1 in.
- Top Margin is to tell Koha how big is the margin before the label starts on the top of the page. Try to be as precise as you can with your ruler- I am measuring by to .5 inches.
- Left Page Margin- this is also asking what is the margin on the side before the label begins. I am measuring this to be .5 inches also.
- Top Text Margin – now this is where I say about where do I want the printing of the label begins. I will say this is .2 inches.
- Left Text Margin- if I put a 0 in this box, the printing of the label will start right on the left edge of the label, so I want to have a little bit of a space- will put .125 inches.
- Number of Columns and Number of Rows- this will tell Koha how many labels are on the sheet.
- Gap between columns and Rows- are there gaps between the labels and if so, how much. My label sheet does not show any gap.
- Profile- this is if you want to set up a printer profile in Koha. I will talk about this at the end of the blog post in the troubleshooting part.
Here is what my Label Template looks like.
The second label template is for the Zebra GX430t- one of our parnters shared with me her setup for her labels.
For the label template it’s:
page height: 2in
page width: 3in
label width: 1in
label height: 1.5in
top text margin: 0.33in
and all the other options are 0.
She also does a few actual printer settings for her Zebra printer:
up: .33
bottom: .33
left side: 1.7
right side: 1.69
If you want to share your label template – add your information into a comment! I would love to increase this knowledge base of the labels for everyone using Koha!
Now we are going to set up what will be printed on this label – which is Label Layout
- Under the same label creator tool, choose New and from here choose Layout.
- Again for the name, I would get specific to what this label layout will be used for-so if you create more than one of these layouts- you will have the right one.
- Choose Barcode Type- if this was a barcode label, you would choose the Encoding for the barcode. I will have another Barcode blog post to discuss this more.
- Choose Layout Type- we are creating a spine label, so the layout type would be Biblio.
- Barcode/Biblio- is used when you want to print a barcode and also maybe the title of the book also. Barcode would be on first on the label and the biblio information would be below it.
- Biblio/Barcode- same as a but the biblio information would be on the top and the barcode would be below.
- Alternating
- Barcode- if you just wanted to print barcodes.
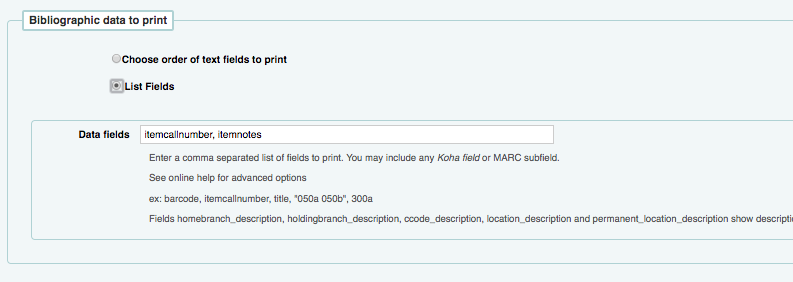
- Bibliographic data to print
- There are two ways to include the data you would like to include on the label.
- Some predetermined fields are first listed and from here you can determine which you would like to include and also in what order.
- The other option is to input the fields under the List Fields option you can specify MARC subfields as a 4-character tag-subfield string: (ie. 245a for the title field). The fields available are from the database tables. Use this link to find the field names to use- the tables are currently used : items, biblioitems, biblio, branches.
- There are two ways to include the data you would like to include on the label.
- A few more options in addition to choosing what your fields your label will include: draw guide boxes, split call number, text justification, font, font size and Oblique title.
- Once you save this layout- you are ready to save and start printing!
Creating a Label Batch to print.
- To create a batch of labels to print, you will choose from the New dropdown menu and choose New Label Batch.
- Here you can choose to add barcodes or item numbers to the text box provided.
- Once you have scanned in some barcodes, you will see the items you have scanned:
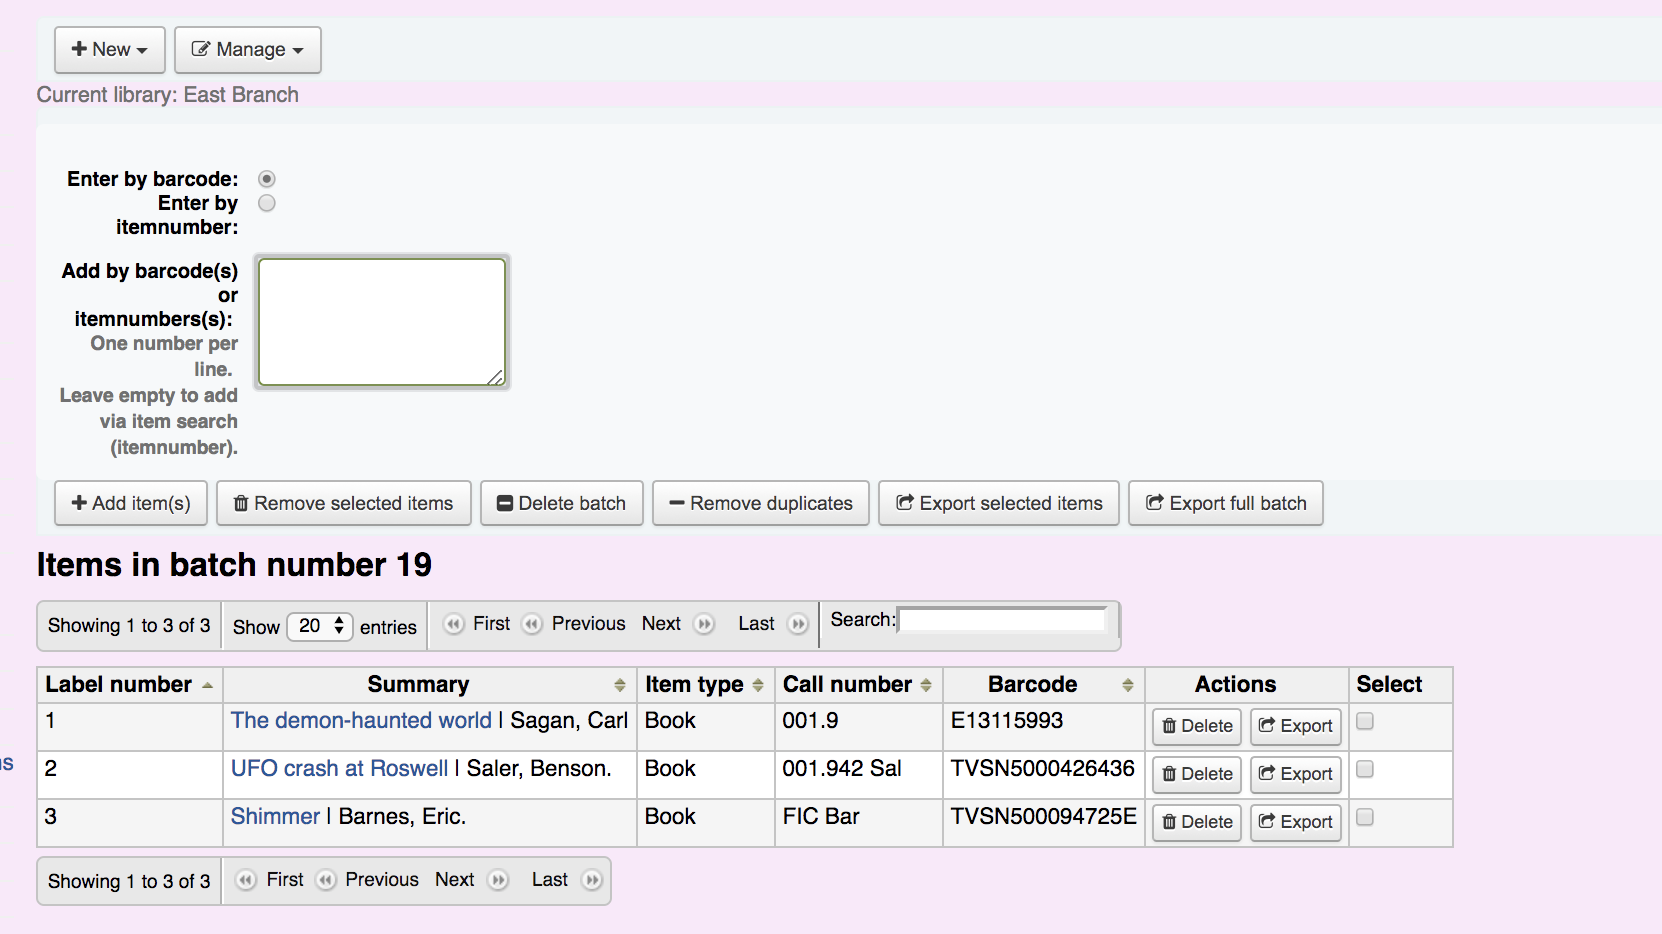 Selecting to export the full batch will choose all the items or selecting to export specific items for what you would like to print.
 - Now this is the important part, you must choose what template to print the labels on and what layout will be used. Also where the labels should start on the page.
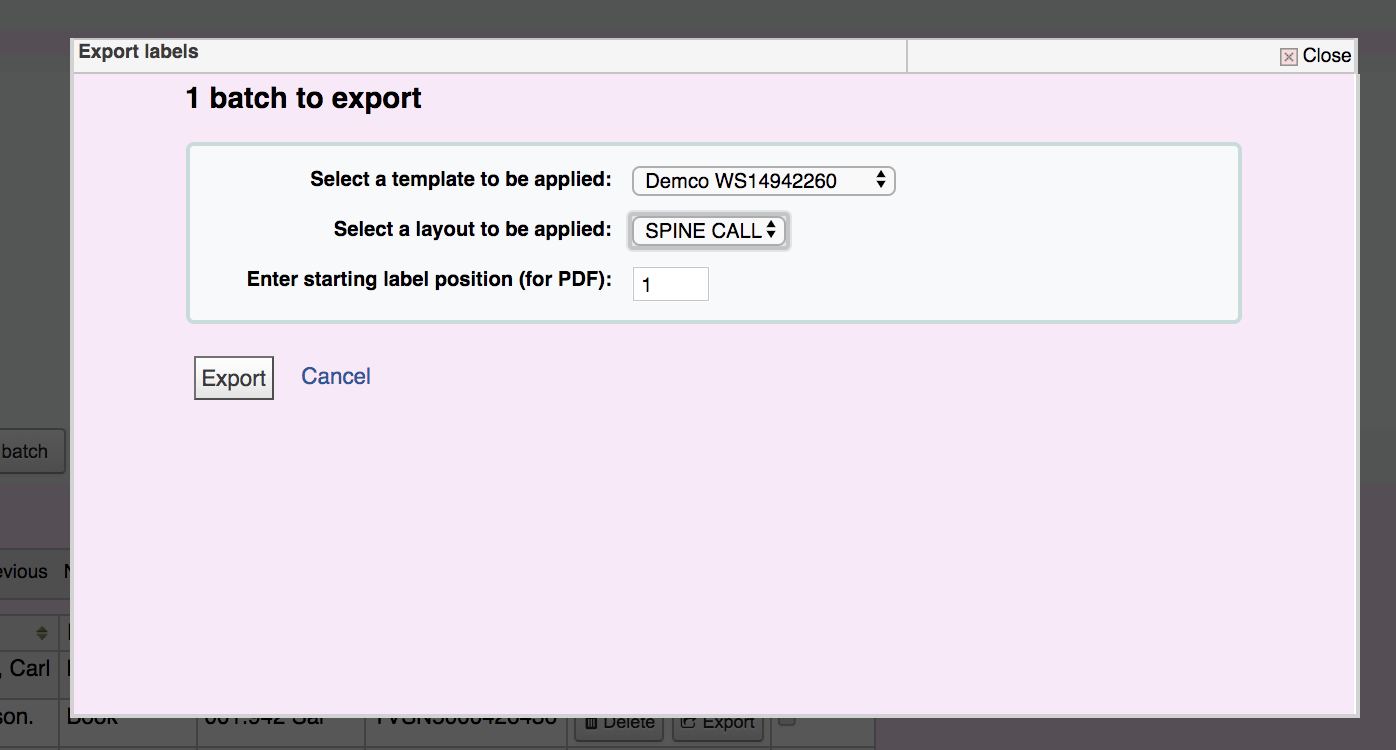
- Click Export and you can download this label document as a PDF, CSV, or XML.
- Once you download the document- print! You have successfully created a sheet of labels !
Q&A on Spine Labels
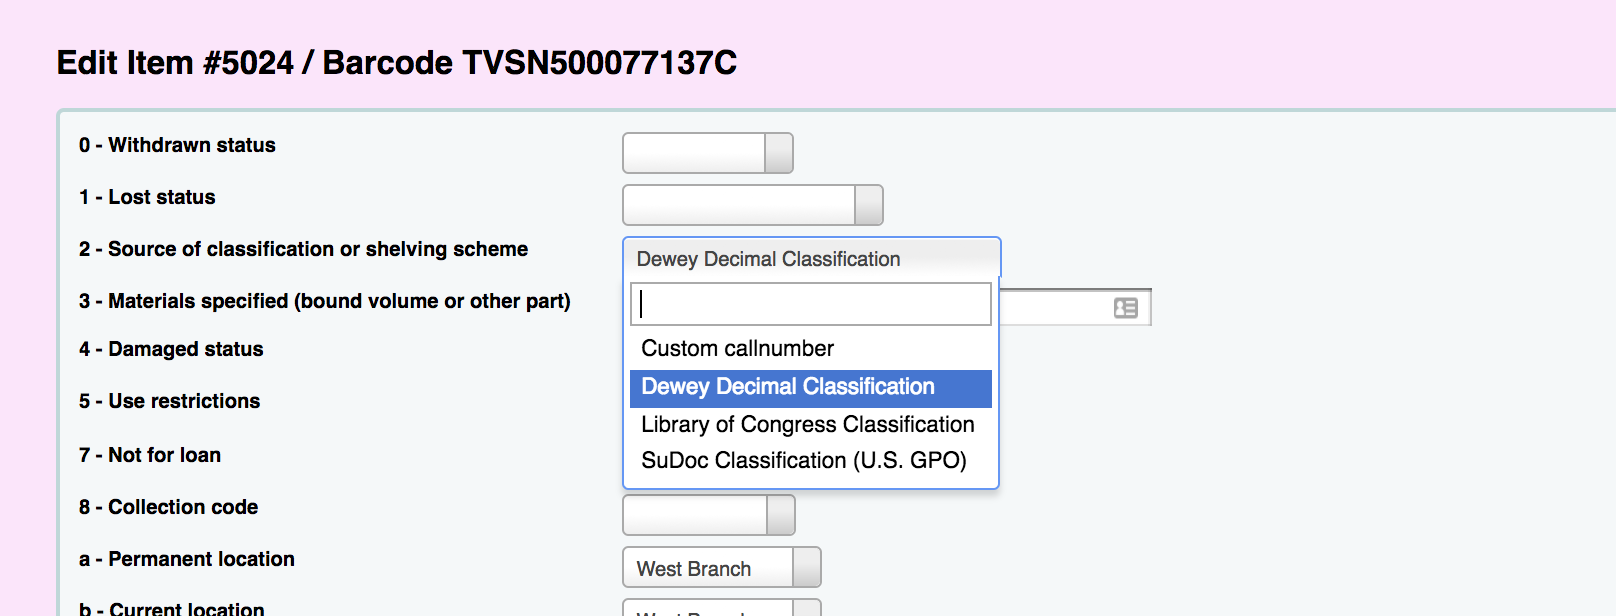
Q: My call numbers do not seem to be splitting correctly?
A: Koha goes by the classification scheme of the item you are printing. If your item’s call number is a Library of Congress number, check in the Item Record to ensure that the Classification scheme is listed as a Library of Congress.
Q: Can we add Public Notes to a spine label?
A: Yes you can! When setting up your label layout, you will include that field in the List Field section. Public notes are found in the schema and are called itemnotes. My screen shot shows that field in addition to the item call number.
I hope I have been able to aid you in the process of creating spine labels with Koha’s Label Creator!
I will have a blog post on Barcode labels coming soon! Subscribe to our website or Youtube channel to get updates sent directly to your email!
For more tutorial videos- visit or subscribe to our Bywater Youtube Channel!
Read more by Kelly McElligott