 by Morgan Daigneault on Sep 30, 2021
As of 21.12.00, Aspen Discovery has an upgraded HTML editor! We’ve made the switch to TinyMCE, an open source editor with a lot of great functionality.
Thankfully, you don’t need to know how to code with HTML in order to use this more advanced editor. If you are comfortable with HTML, however, this editor can unlock some great capabilities for you.
By default, most of the text editors in Aspen use Markdown, a simplified text-to-HTML language that uses symbols to create formatted text.

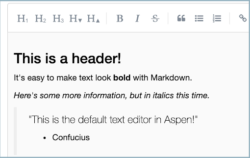
The only exception to this is the text editor within Placards, which uses the HTML editor by default. If you’ve made a placard, chances are you’ve already used the HTML editor! Not so scary, right?
Let’s take a look at this new editor together:

Right away you can see a difference between the HTML editor and the Markup editor. Some of the functions are fairly intuitive, such as the text formatting options (bold, italic, underline, and strikethrough), headings, font choice, and font size. You can also select different text colors and text background colors! And to round off the options, you have the ability to create numbered or bulleted lists and adjust alignment.
While all that’s pretty nice on its own, let’s get into some of the new features we’re extra excited about!
Images
Adding images with this editor is a breeze. Click the image icon, then click the Upload tab to upload a new image. Click Browse for an image, or simply drag and drop the image of your choice.
Once the image is uploaded, you’ll be able to add an image description if you like and view the dimensions.
I noticed the dimensions of my image are pretty huge, so you can adjust the width and/or height here. “Constrain proportions” is checked by default, which means if you change one number, the other number will adjust in proportion. This ensures that your image doesn’t look squashed or stretched.

You can also now resize images directly within the editor! After the image is placed, just click and drag the corner of the image to resize. Additionally, you can click an image within the editor to see a pop-up menu. Here you can rotate and flip the image, open up the image options to edit the description or dimensions, and even open an image editor!

The image editor allows you to crop the image and adjust the contrast, brightness, sharpness, color levels, and more. As you can imagine, being able to resize, crop, and edit images all in one place is a huge convenience and saves a lot of time.

Tables
Another fantastic feature of the TinyMCE editor is the ability to add tables. Click the Table icon to select the number of columns and rows for your table. You can also right-click anywhere in the editor to insert a table, along with other options.

Click and drag the corners of the table to resize the whole table. Hover over the dividers between columns or rows to increase or decrease their size. Clicking on the table itself will open up a menu of options for adding or deleting cells, rows, and columns.
You can also open the Table Properties dialog box to access even more options for customization. To adjust the options for individual cells, right-click on the cell to open the properties and switch to the Advanced tab.

Tables aren’t just for organizing information. With some tweaking and creativity, you can use tables to create tips and buttons, and you have more control over how images and text are arranged together.

Collection Spotlights
While you can embed collection spotlights within their own cells when using Custom Pages, you can also embed them within a page using the HTML editor.
From the Collection Spotlight settings, copy the source code. Click here to learn more about Collection Spotlights. Switch back to the HTML editor and click the Source Code icon in the top left corner. This allows you to see the HTML code behind everything you do within the editor.
If you’re not used to HTML code, it can seem a little overwhelming at first! It can be helpful to look for familiar text as a visual clue for where something is on the page. You could even type something on the page such as “PLACE COLLECTION SPOTLIGHT HERE,” then switch to the Source Code screen and look for that text. Delete the text and replace it with your spotlight code, then close the screen to return to the editor.
Once the code is added successfully, you should see your collection spotlight on the page right away.

Working with Source Code
If you’re ready to start experimenting, or if you’re already comfortable with HTML, you’ll want to make sure that the HTML tags you’re trying to use are allowed in the settings.
Navigate to the System Administration module within Aspen Administration, then click System Variables.
Click into your settings and scroll down to the bottom where you’ll see a field called “Allowable HTML Tags.” You can either delete the contents to allow all tags, or insert specific tags and separate them with pipes. The benefit of allowing only certain tags is to have more control over the type of code that’s allowed within your pages and make sure things remain consistent.

In these settings, you also have the option to check “Use HTML Editor rather than Markdown.” Checking this will convert ALL text editors in Aspen to the HTML editor. If you share administration responsibilities with staff who are more comfortable with the simplified Markdown editor, you may want to discuss with them first before enabling this option. However, worry not! If you do make the switch, all content previously created with the Markdown editors will remain intact. Aspen will convert the content and formatting to be compatible with the HTML editors.
As you can see, the new HTML editor opens up a lot of new possibilities for your placards, Web Builder pages, and anywhere Aspen allows the use of text editors. We hope these highlights inspire you to give it a try and explore all the other features it has to offer. If you come up with something amazing using the new editor, reach out to us by email or post it in our Aspen Discovery Slack workspace. We love to see what you do!
Read more by Morgan Daigneault