Libki Kiosk Management
Customizing Guest Passes in Libki
 by Jessie Zairo on May 18, 2021
Customing guest passes for your Libki client is simple! If you allow guests to come in for access to your public terminals, we will show you how to set those passes up for quick access on Libki without a patron account!
Adding Customized Guest Passes
- Start by heading to Administration and click the More dropdown, select Settings.
- Scroll down on the left-hand side and click on Guest Passes
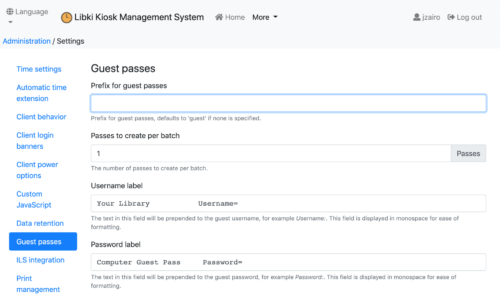
- Prefix for guest passes
- You can customize the prefix for guest passes. It will default to 'guest' if none is specified.
- Passes to create per batch
- You can define the number of passes to create per batch. think about how many you want to print each morning before opening!
- Username label
- This field allows you to define what test shows for the username. Some libraries use the Library or Branch Name to specify the user.
- This field allows you to define what test shows for the username. Some libraries use the Library or Branch Name to specify the user.
- Password label
- This field allows you to prepend the guest password. Some libraries will add the initials of their library or branch to specify.
- Guest pass CSS
- You can add custom CSS for batch guest passes in this field. Want to style the font and text? Enter your CSS here!
Click Update once complete!
Printing the Passes
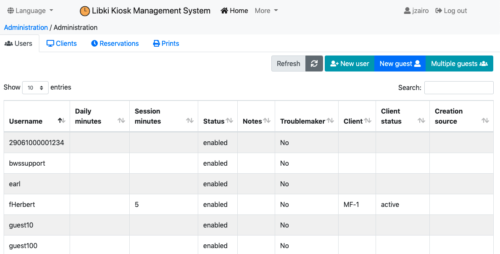
From the administration, click on Multiple guests on the right-hand side.
This will populate a modal window where you can view and print the guest passes. This information is populated from the settings we set above. If you want to make changes, you can modify in administration.
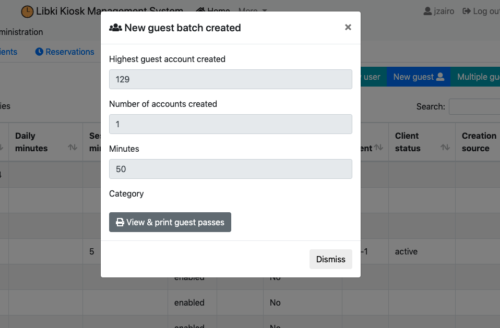
This will create a printable page for your guest passes to easily pass out throughout the day. (Example below).
ByWater Solutions Username=guest129
Computer Guest Pass Password=bws 6283
Libki Tutorials
For more Libki tutorials check out Libki Kiosk Management.
The Community Manual is available online at: https://manual.libki.org/.
Read more by Jessie Zairo